Wednesday, October 1, 2008

Style ADD!!!

One problem with being open-minded and interested in everything is that it makes one's "style" become so confusing that it is easy to loose track of self. I've been trying to figure out what my style is...and pretty much who I am. I swear I have a serious case of style ADD! And I'm not sure if my craft style matches my dressing style. So here I am trying to make sense of it all:


Goth/Emo
I like some of these styles, but not enough to feel like I look good in them. I do love the jolly roger/poison symbol, and make many things with it on them, but they usually end up just collecting dust. (But skulls are also fashionable in other styles nowadays, too!)

Rock & Roll
I love both the music and the style. I do own more of this style than any other, but I don't always feel like looking this way. And sometimes I feel out of place. However, it does hold up to my lifestyle.

Vintage
I like many vintage things But I can't see myself liking how I look in most vintage fashions.

Girly
I love making dresses. I like to look pretty. And I would like the way many look on me if life were a still shot...But I get out of vehicles one leg at a time...And dresses aren't that practical with how I live my life.

Skanky

I can design the hell out of some cool ass skank-wear, but I don't like to show much, and I don't like to look trashy.

Hippie
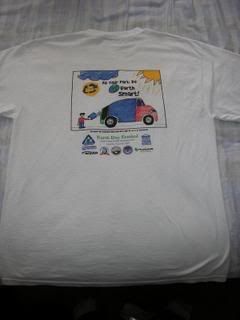
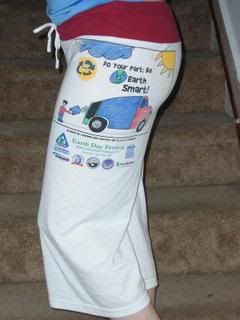
Hippie-wear is sooo cute and comfy. I do think alot of it looks good on me. And most of it is eco-friendly...which is kinda a big deal to me. But most of it can't handle my lifestyle.

Crafty
Of course I love to make everything under the sun, but I don't really know what I feel about the crafty look. I do like things I see with that style, but I never really tested out how I feel wearing it.

~~~~~

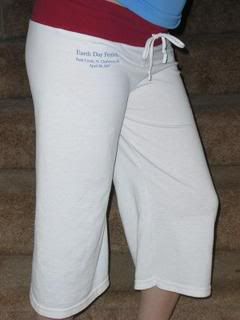
When it comes down to it, most of what I own doesn't match anything else I own, so I end up wearing mostly jeans and t-shirts. (Which I hate, but it does hold up to my lifestyle and is easy to match up on a whim.) And I am so weird about wanting clothes that are original and different, and that make people turn heads in a good way, but I hate to be stared at, and always think people are thinking bad things when they look at me. I hate my feet and simply don't know how to match shoes to outfits, so I always end up wearing my steel-toes. I LOOOVE SCARVES!!! But I can't ever seem to find something that matches them that I want to wear. And they get taken off and left places since I can't wear them safely when using machinery or hunched over a motor. I love to make purses and hand bags, but I usually don't carry them because I can't match them up, and I also forget I have them and leave them places. I, also, don't know how to style my hair to match these fashions. I can think things up but can't pull them off.

Monday, August 18, 2008

T-shirt Yoga Pants Tutorial (my version)


I'm sorry I'm late with the tutorial. My wireless went out Thursday. I am using Retta's until she kicks me off. So this is kinda being rushed.

Here Goes:


***Make sure the distance from armpit to armpit on the shirt you are using is bigger than your thigh measurement. For the waist you can use the sleeves of the t-shirt, a skort like my last pair, another shirt like this pair, or just any fabric that you can get to the measurement needed. For drawstring you can use ribbon, rope, long boot shoelaces, one of the sleeves cut into a spiral so as to make a long string, etc.

Also, for the waist, make sure your fabric doesn't fray, or extra steps will have to be taken.***

Step 1: Lay your T out flat, making sure to line up the bottom front with the bottom back.

Step 2: Cutting thru the front and the back at the same time, cut the sleeves off at the seams. (Cut so as to leave the seams on the sleeves, not the shirt.)


Step 3: Cut from the armpits to the bottom sides of the shirt, following the folds made from it laying flat.

Step 4: Cut the neck and shoulders off by cutting straight and even, thru both layers, from one arm to the other, just below the neckline.


Step 5: You now have the 2 (unsewn) legs. Set one to the side. Fold the other one, lining up the 2 edges you cut in step 3, with outsides facing in, pin and sew securing ends. Repeat for other leg. (The red yarn shows where was sewn.)


Step 6: Turn them right side out. Line up the arm holes, outsides facing in, pin and sew from the inside, securing ends.

Step 7: Try them on both ways. Determine which side will be the front. Now measure from the back seam of the pants up to where you want your waist to end. Multiply that by 2 and add seam allowances at both ends. (I used my finger to measure. My waist just happened to be the same measurement as my index tip to knuckle. It is easier and more accurate than a ruler, which you have to distort yourself to read the measurement.)

Step 8: By whatever means, make a rectangle that is (your waist measurement+ seam allowances) by (measurement from step 7.)

Step 9: Outsides facing in, line up the shorter edges, pin and sew securing ends.

Step 10: Lay your pants flat, right side out. Take the waist tube you just made, turn it inside out, and put around top of pants with the tube seam lined up with the back pant seam. (If you used 2 equal pieces to make the waist tube, line the seams up with the side folds of the pants as they lay flat.) Line up, pin, and sew around, securing edges.


Step 11: Now fold the waistband in (If using elastic instead of a drawstring, now is the time to put it in.) Line up the edge of the inner waist band, with the edge of the seam, pin & sew, securing edges.

Step 12: Now that your pants are sewn, all that is left is the drawstring. Move to the middle of the front of the waistband. (use pant seam to line up.) Half-way up the waist, outer layer only, fold over and make 2 small vertical holes. (The front seam should line up right between these 2 holes.)


Step 13: String as shown below:


If any of this doesn't make sense to you, please let me know.
Also, I would love to see any that yall make.


And yes I did lose weight. Don't I look good!?! LOL

Tuesday, August 12, 2008

Ha Ha Ha!!!

Something funny I saw on Crafty Chica's blog that I had to share with yall:


~~~~~

I now have another shirt to use to
make the yoga pants tutorial (my version).
So expect it to be posted by Friday.


~~~~~

I have been using

the in-law's wii fit,
and it kicks @$$!
The best 'workout'
I may have ever had!
And I am sooo sore!


~~~~~

Craft plans:


~I hope to be making a pair of men's house pants for Travis, soon. I have to make the pattern, and find manly-looking fabric. LOL
~I hope to complete my eye mask that I am making for when I have migranes.
~I hope to have the fabric soon to make my wedding dress.
~More totebags, of course.
~And a few surprises along the way.

~~~~~

***Let's keep in mind that I am an Aquarius. So I can't really plan for shit.
So there is a high possibility that I will end up doing none of the above anytime soon, instead I'll do like 20 other things, and this whole boring blog post was to steal 10 minutes from your life that you will NEVER get back!!! LOL***

~~~~~


Thursday, August 7, 2008

Pumpkin's Yoga Pants

I have always been an arts & crafts kinda girl, but I usually don't show off the things I create. (At least not since middle school.) Here lately, tho, I've had the urge to show off a bit. Maybe it is proof that my confidence is finally increasing...Or maybe I just decided 'to hell with everyone's potentially negative opinions'.....Who knows!?!

Either way...Whatever!.....


~~~~~
Pumpkin's Yoga Pants:

What do you get when you mix one part really huge shirt


+
One part ugly but comfy skort


+
3 parts buttons
& a mountain of creativity?


Yoga Pants of course!


And a matching fur~baby collar!


They are so comfy!!! And they look fantabulous!!!!!

Friday, August 1, 2008

Tote-ally Crafty Bag Challenge

I entered the Tote-ally Crafty Bag Challenge on Craftstylish!

I almost didn't enter because of all the people that were breaking the rules and still allowed to stay in the competition. But Travis convinced me to join anyways. We can only hope that those running it will do the right thing. (...whether I win or lose.....)

So here's my last minute throw together:


Looks like a piece of candy!


Open flat.


Pulled drawstring.

I wanted a tote that could fit in my purse in a small form. So I don't have to have multiple empty totes on my shoulder walking into a store so I won't have to use plastic bags upon leaving. This way, it is there when I need it, and out of sight when I don't. It looks like a piece of candy when in it's small form, and like a regular cherry drawstring bag in it's large form.
I am entering it into the Tote-ally Craft Bag Challenge; in the omni-crafter category.
It is made from recycled white bed linens, red table cloth (that was a truck bench seat cover before it was a table cloth!), red coinlike charms from a belly dancing waist scarf thing, scraps of yarn, and the drawstring came from a broken dogleash.
I would really like to win because I feel my bag is innovative, and I could really use the fabric.com gift certificate for my wedding dress.
(The red is redder than the pics make it look like. The stems of the cherries are 2 strands of yarn sewn twisted.....brown and green.)

So...what do yall think?


Like what you see? Let us know! :)